An electrical installation inspection is a critical step in ensuring that new or modified electrical work is safe, compliant, and functioning as intended. This process, which includes visual checks and testing, is usually carried out by a qualified electrician or electrical inspector. Preparation is key to a smooth inspection and passing without delays or remedial work.
This guide outlines the steps and best practices to properly prepare for an electrical installation inspection, whether in a domestic, commercial, or industrial setting.
1. Understand the Purpose of the Inspection
The main goals of an inspection are to:
- Ensure compliance with BS 7671 (IET Wiring Regulations)
- Verify safety and functionality of circuits and devices
- Identify potential faults, hazards, or non-compliances
- Produce certification (e.g., EIC, MEIWC, or EICR)
Knowing what the inspector is looking for helps you prepare your installation thoroughly.
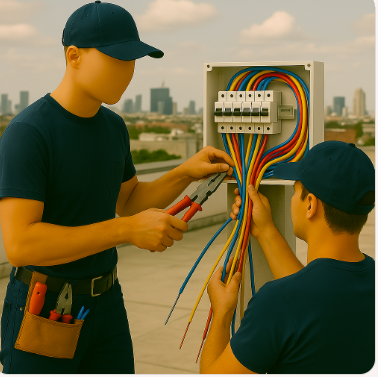
2. Have All Work Fully Completed
Before scheduling the inspection:
- Ensure all wiring is completed, including final terminations.
- Fit all accessories: sockets, switches, light fittings, and enclosures.
- Complete labelling, such as at the consumer unit and isolators.
- Confirm that all connections are secure and appropriately dressed inside enclosures.
- Make sure the installation is free from debris, exposed conductors, or temporary fixings.
An incomplete installation may result in a failed inspection or the need for a second visit.
3. Prepare Required Documentation
Have the following documents ready before the inspector arrives:
- Circuit diagrams or layout drawings
- Schedule of circuits with protective devices and cable sizes
- Manufacturer’s instructions for specialist equipment
- Risk assessments or method statements (especially on construction sites)
- Any previous test records or EICRs (for additions or alterations)
These documents help demonstrate compliance and provide necessary background information.
4. Perform Visual Checks
Go through the entire installation and perform your own visual inspection, checking for:
- Correct cable types, sizes, and routes
- Proper support and securing of cables (cable clips, conduit, trunking)
- No visible damage to insulation or accessories
- Securely mounted distribution boards, switches, and sockets
- Accessible isolation points and labels
- Correct IP ratings in areas exposed to water or dust
Check that all work aligns with Regulation 134.1.1 (good workmanship and materials).
5. Perform Dead Testing (if competent)
If you’re qualified to do so, carry out the following preliminary tests before the inspector arrives:
- Continuity of protective conductors (CPC)
- Continuity of ring final circuit conductors
- Insulation resistance testing
- Polarity checks
- Earth electrode resistance (if applicable)
Use calibrated test instruments and record the results. These can be compared with those taken by the inspector.
6. Prepare for Live Testing
Ensure the installation is safe and ready for live testing. This may include:
- Confirming all circuits are properly connected and labelled
- Ensuring RCDs are wired correctly and ready to trip on test
- Making sure main earthing and bonding are complete
- Verifying correct Ze (external earth fault loop impedance) from the supply
The inspector will likely conduct live testing for RCD operation, Zs values, and functional verification of protective devices.
7. Ensure Safe Access and Work Environment
Make the inspection site safe and accessible:
- Clear obstructions around consumer units, isolators, and outlets
- Provide access equipment (e.g., ladders) if testing involves high fittings
- Ensure good lighting and ventilation
- Use lock-off devices where circuits are being tested
- Make sure all persons on-site are aware of the inspection to avoid accidental energisation
Safety and cooperation make for a smoother process.
8. Be Ready to Answer Questions
An inspector may ask for clarification on:
- Cable routes
- Load calculations
- Design choices
- Deviations from the norm (with justifications)
Being prepared with clear answers or documentation helps demonstrate competence and professionalism.
Conclusion
Proper preparation for an electrical installation inspection reduces the risk of failure, saves time, and shows due diligence. By completing the installation to a high standard, gathering the correct documentation, and conducting your own visual and test checks, you improve the chances of a successful inspection and certification.
Recent Comments