Trunking is a type of cable management system used to protect and route electrical wiring, typically made of plastic (PVC) or metal. It’s widely used in homes, offices, workshops, and industrial settings to keep cables tidy, protected, and safe from damage or tampering. Properly securing trunking to a wall is essential for both function and appearance.
This guide walks you through the tools, preparation, and step-by-step method to fix trunking securely to a wall.
Tools and Materials Needed
- PVC or metal trunking (appropriate size for the cables)
- Measuring tape
- Spirit level or laser level
- Pencil or marker
- Wall plugs and screws (or adhesive if using glue method)
- Drill with masonry bits (for brick/concrete walls)
- Screwdriver
- Hacksaw or trunking cutter
- Adhesive (optional: for smooth surfaces like plasterboard)
- Rawl plugs (for solid walls)
Step-by-Step Guide to Securing Trunking
1. Plan the Cable Route
Before starting, plan where the trunking will go:
- Map out the route on the wall, avoiding obstacles like doors, radiators, or sockets.
- Make sure the path is as straight as possible for a neat finish.
- Determine entry and exit points for the cables (such as outlets or panels).
If the route includes corners, T-junctions, or end caps, purchase the appropriate trunking accessories.
2. Measure and Mark the Wall
- Use a measuring tape and spirit level to ensure the trunking line is straight and level (horizontal) or plumb (vertical).
- Mark the fixing points on the wall, typically every 300 to 500 mm for PVC trunking and closer (200–300 mm) for heavier metal trunking.
- Also mark where bends or cuts are needed.
Accurate markings reduce errors and ensure a professional look.
3. Cut the Trunking to Length
- Use a hacksaw or trunking cutter to cut the trunking sections to the required lengths.
- Make sure the edges are smooth and free from burrs. Deburr if necessary to prevent cable damage.
- If using accessories (like internal/external bends), leave enough room to fit them properly.
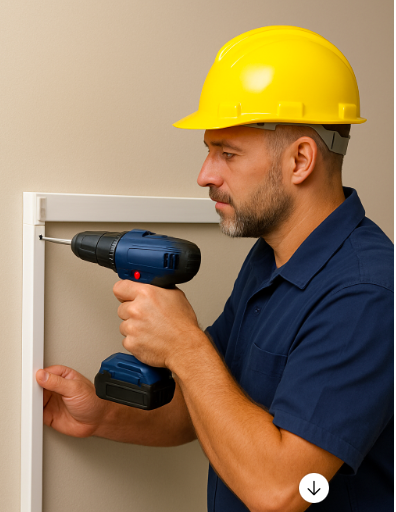
4. Drill Fixing Holes
For solid walls (brick, block, or concrete):
- Drill pilot holes using a masonry bit.
- Insert rawl plugs or wall plugs at the marked points.
For drywall or plasterboard:
- Use appropriate drywall anchors or consider adhesive fixing for light PVC trunking.
5. Secure the Trunking Base
- Place the base section of the trunking (without the lid) against the wall.
- Line it up with your markings and fix it using screws through the pre-drilled holes.
- Start with the ends, check alignment with a level, then fix the remaining screws.
For adhesive mounting (lightweight applications only):
- Apply strong grab adhesive or double-sided mounting tape along the back.
- Press firmly against the wall for 30 seconds, then allow the adhesive to set.
Note: Screws are always more secure, especially for longer or heavier runs.
6. Lay the Cables
Once the base is secured:
- Feed or lay the cables neatly inside the trunking.
- Avoid overfilling—this can cause the lid to pop off or cables to overheat.
- Use cable ties or clips inside the trunking if needed to keep cables organised
7. Fit the Lid
- Snap or slide the trunking lid into place, ensuring it’s flush and secure.
- Wipe the trunking clean for a neat finish.
- Add accessories (corner pieces, end caps, T-junctions) as needed.
Tips for Best Results
- Always follow local electrical codes and safety guidelines.
- Keep cables grouped by type (e.g., separate power and data).
- Leave some spare space for future cable additions.
- Use a cable capacity calculator if you’re unsure about sizing.
Conclusion
Securing trunking to a wall is a simple but important task that improves cable safety, organisation , and aesthetics. By planning carefully, measuring accurately, and using the right tools and fixings, you can achieve a professional and durable result. Whether for home use or commercial installations, neatly installed trunking keeps electrical systems tidy, safe, and compliant.
Recent Comments